This is my June Posting for the Cricut FANatics Blog...Enjoy
WARNING!!! Making of the following layouts will result in "Bulky" Scrapbook Binders.....
I went to a crop a couple of months ago, crops are not really my favorite place to go to get work done because I like to "Social Butterfly" to see what everyone else is working on,. but I go so my friend can have company. I started cutting and putting together "Kits" in January so that I didn't have to drag much more than adhesives, bling and a basic tool kit. Every piece/layer was totally embellished and just had to be attached to the layout. I took 27 kits to assemble plus 5 or 6 of the 3D projects that I've posted on here earlier. I got all the 3d projects completed and 18 of the kits put together that day. I finished the other 9 kits the next day since hubby was out of town.
Today I am going to show you the Cricut layouts that I put together there and a few that I have put together earlier and posted around here and there. These layouts are a combination of freebies and purchased designs from
Monique Griffith's blog. If you are interested in seeing her original designs, click the title and it will take you to the blog page for that layout on her website. I'm not selling anything or affiliated in any way, work and life keep me pretty busy and I just don't have time to sit around and guess what size to cut things at. It's like buying a pattern for clothes...takes all the guess work out of it.
NOTE: she sells directions for cutting and assembling these projects for $5. There are some posts with free directions for layouts (Home for the Holidays and Music to my Ears have directions posted for cutting sizes on the blog-just click their titles to go there), take a look around. These are just some of the projects she offers.
This is the first layout I made using the
free directions on the website. The patterned papers were printed from the Christmas Wish Imagine Cartridge. The cuts are from the Winter Woodland and Everyday Paper Dolls Cartridged. You might have seen this posted on my old blog or the cricut messageboards. It was, and still is, my all time favorite layout.
I will never forget our miniature collie "Naboo" singing along every time my daughter practiced the flute. (I got Naboo the week that the Star Wars 1 was released, I had seen trailers for the movie and wanted to name her Jar Jar Binks soooo bad, but my family rebelled...Her official registered name wound up being Queen Amidala of Naboo). This layout was perfect to record this memory as Naboo has left us. I still have to finish the journalling in the ticket, one of these days........This layout was done using Mickey & Friends and the Quarter Note Cartridge and is Free also.
This layout was done using the A Child's Year Cartridge. I just love all the details and vintage look to this page. I substituted flowers from the Artiste cartridge for this layout, Monique made her flowers by hand cutting a spiral design in a circle. I love the leaves at the bottom of the page, even though they were a pain. I cut them, misted them with water and perfect pearls, wadded them up in a paper towel, then opened the paper towel and let the dry, it was a nice day so I took them outside to dry in the sun.....from out of nowhere a quick breeze sprung up and blew them all over my yard, my dogs thought I was playing a game and were so helpful in picking them up...lol
I used the Yummy Imagine Cartridge to print all the background papers. I couldn't find anything I liked in my stash so I designed the diamond background and teal/black border piece in the Craft room and printed it.
The Diecuts were made using the Nifty Fifties Cartridge.
The old "Merc" in the photo's was our graduation gift to our son in 2002. That's Dad, Grandpa and family friend "Uncle Harry" taking it for a cruise around the MIS raceway in Brooklyn, Michigan. The guys really enjoyed that, as soon as I saw this layout I knew I had found the perfect layout for this memory. The guys haven't said anything about the pink stuff in it, but I think they like it in spite of the pink.
The rest of the layouts were ones I worked on at the crop. sorry for the funkiness in some of the pictures, I couldn't get the lighting to cooperate, of course it would help if I wasn't up in the middle of the night trying to take pictures with a glaring fluorescent light!
 |
| Used a tan and blue color scheme to make my version of this layout. |
 |
| I love this color scheme, when I printed out my daughter's pictures in sepia tone they looked way to yellow so I did some research and found a "Bronzing" action for Photoshop. It's hard to tell here because the lighting made the pictures look wonky, but that bronze color tone matches the background paper perfectly. |
 |
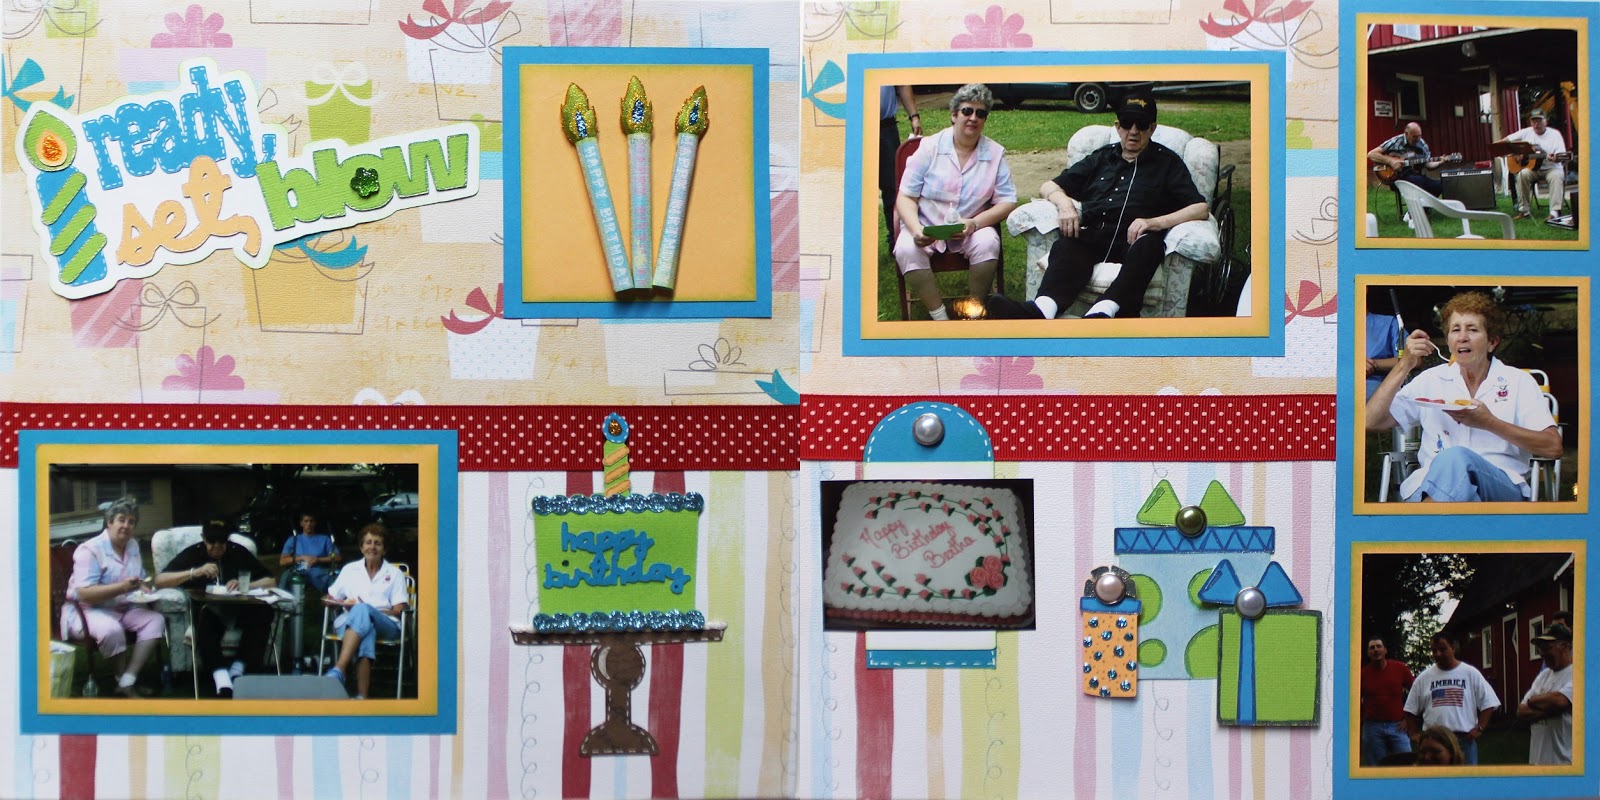
| My grandson is a Lego Maniac, these are pictures from his birthday last year, he got enough money to buy the Millenium Falcon,. It has more than 1,000 pieces to put it together. |
 |
| Originally designed for the Cricut Stampede, I changed the title to use for my grandson's pony birthday party... |
 |
| I changed this layout around quite a bit. Swapped out a lamp post for the signpost called for in the directions, I still need to add a wreath around it. The light colored paper at the bottom was supposed to be at the top, didn't even notice it until I had the "hill" by the door glued down-no way to fix it so it was put together with an up-side-down background. |
 |
My grandson loves to play with that cork gun "Uncle Harry" bought him at Cabelas. For this particular play session Connor, Dad and Papa all donned hats of some sort and had weapons, there we so many cute pictures that I wanted to include so I designed a mini flip book on the right page using zutter 4x6 photo pages.
 |
| I trimmed the pictures down to size then trimmed the photo pages. Next I tied ribbons in the rectangular openings to cover the binding holes. |
 |
| When this page is inserted in the album, I have cut out an opening in the page protecrtor so that the album pages can be viewed without taking the page out of the protector... |
|
 |
| All Background Papers were printed using the Yummy Imagine Cartridge. I Changed this up a bit because the layout would have been over busy if I used all the items called for in the directions. |
 |
| My grandson's 2nd visit to a zoo, this time with his daddy... |
 |
| These photo's were taken for my Photography class for various techniques. |
 |
| The Monsters, Inc. movie helped my grandson get over his fears about monsters under the bed and such. He now knows that only the "Tickle" monster lives at Grandma's, all the other monsters are scared of our big dog. |
 |
| The bottom background page was preprinted cardstock I bought at the fall crop in September. It fit perfectly with the theme and colors that were chosen for making this layout. |
 |
| Grandson's first visit to the zoo with Grandma & Papa. I love these pictures. This was such a special day, it was the first time we took him on an outing. |
***********
Love At First Sight
This layout is one I did at the crop and can share here because it has a Cricut cut on it. The original came from the Close to my Heart Spring Summer 2013 catalog pg. 49. I used some left over pieces of the Later Sk8r paper packages I had used to make his baseball and basketball layouts from. I searched for the word Love and created at 1st sight with various fonts then manipulated the files in the Craft Room to weld together. Since there wasn't a shadow for the words I had created, I used a trick Monique taught me about cutting a set in the color you want your shadow and offsetting them to create the appearance of a shadow.
 |
| It was Love at 1st Sight when Connor got to see his gift for his 2nd birthday (to stay at grandma's-mom & nana don't like dogs). Grandma thinks all kids should have a pet to teach them kindness and responsibility and that is what he asked for as his gift. This is Snoopy the Rat Terrier who was only 3 weeks old when she traveled from Kentucky to Michigan to become Connor's best friend. They have both grown over the last 6 years, Snoopy still loves Connor, but wants to sleep after an hour of playing. We got a big German Shepherd also that Connor can lay on and play tug with, they both follow him around when he visits then stare out the window waiting for him to return when he leaves. They are so adorable together. |
Well, that's not all of them, but that's all I can share here. I'll work on posting more on my blog over the next few months, so be sure to visit and subscribe to see what else I've come up with. My crafting is expanding in a different direction that can't be shared here. I've become obsessed with the Mixed Media Canvas stuff and have gotten quite a few "non" Cricut toys to play with. I still use Cricuts, but am working with my other toys more because I've just been dabbling, but I really need to spend some time playing with it and learning to design my own projects.
Unfortunately, next month's posting will be my final regular posting. You're welcome to stop by my blog and see some of the new things I'm doing and learning. I'll send postings to Deb occasionally when they are appropriate for this forum because I've got to many Cricut's just to let them sit idle.
Freda
canncreatedesigns.blogspot.com